
Clusia care guides
How fast does clusia grow?
Clusia growth depends on species, establishment, and site conditions, so a fixed annual increase is not reliable. UF/IFAS describes Clusia rosea as moderately growing, not as a guaranteed fast privacy screen.
· Clusia King Farms
Separate height from useful screening
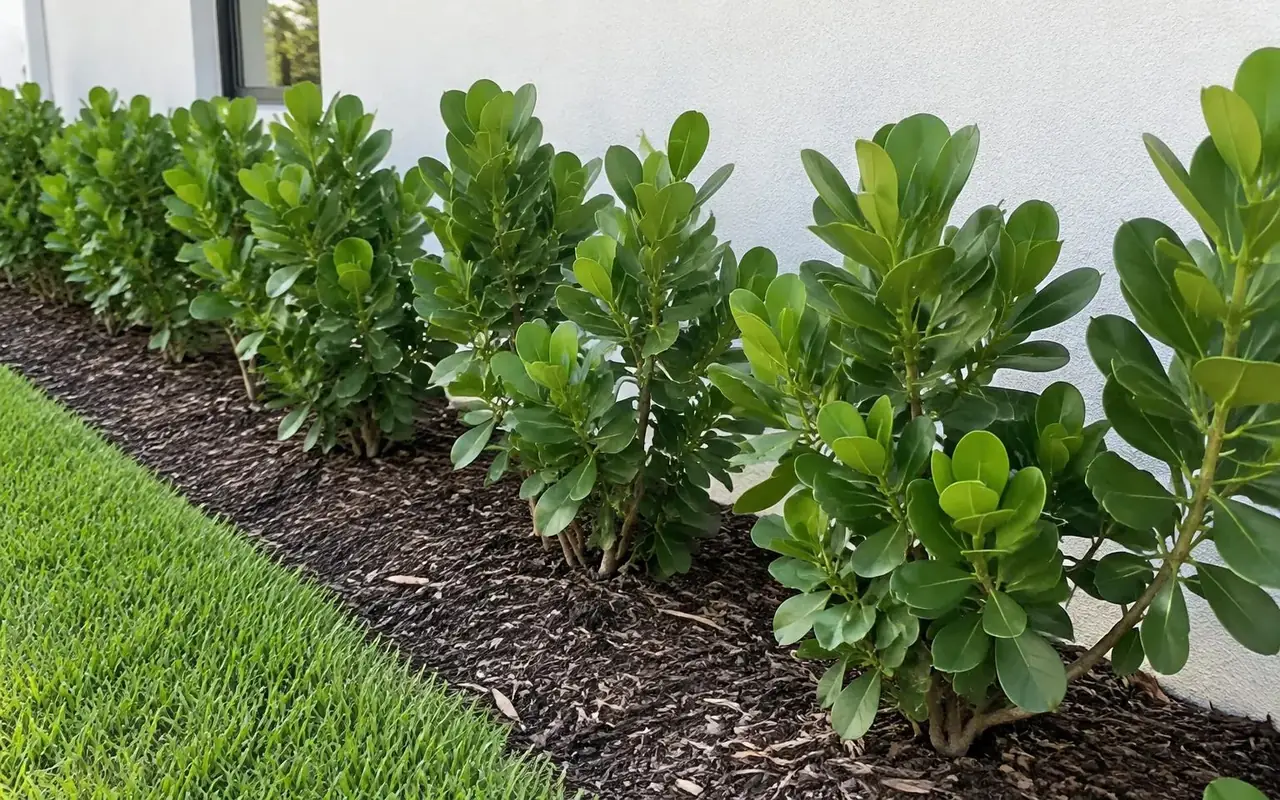
A tall shoot does not mean the hedge has become a continuous privacy screen. Useful coverage depends on branching, leaf density, gaps between plants, and foliage near the ground. Decide which sightline matters: a seated patio view, a neighboring window, or a boundary seen from the street. Photograph that view before installation and use it as your reference. Ask the supplier about the actual fullness of available stock rather than a universal growth rate. When immediate screening is essential, evaluate the starting plant form and consider whether an approved nonliving screen is needed while vegetation establishes. Do not turn a marketing estimate into a promised completion date.
Identify the plant before choosing a plan
Confirm the botanical name on the nursery label and ask the supplier to identify the actual stock. Clusia rosea and the small-leaved plant commonly sold as Clusia guttifera are not interchangeable names. UF/IFAS documents C. rosea as a tree reaching about 25–30 feet tall and 15–25 feet wide, with moderate growth. Those dimensions describe an unrestrained tree, not a promise about a regularly clipped hedge. The same publication lists USDA zones 10B–11, full sun to dappled shade, and high drought and aerosol salt tolerance. Treat those tolerances as established-plant characteristics, not permission to neglect new transplants. Do not transfer its hardiness, mature dimensions, or other species-specific data automatically to C. guttifera. Keep the plant label and any written nursery identification with your landscape records.
Establishment can look uneventful
After planting, visible shoot extension may not reflect everything happening below ground. Root disturbance, a change in light, and differences between nursery media and landscape soil can interrupt the appearance of steady growth. Check planting depth and root-zone moisture before deciding the plant is failing. Avoid repeatedly lifting or tugging a plant to inspect roots; use installation photographs and professional inspection where necessary. New leaves, stable color, and gradually improving firmness can be more useful observations than demanding a particular amount of height. A newly installed large specimen can also need careful support through establishment; its size does not exempt it from transplant stress or irrigation checks.
Manage limits instead of forcing growth
Poor drainage, inconsistent root-ball moisture, shade differences, and repeated heavy cutting can explain uneven progress along a hedge. Inspect the slow section against a healthier section under similar conditions. Look for irrigation coverage gaps, compacted construction soil, and runoff patterns before adding fertilizer. More feed is not a reliable cure for an unsuitable site and may create unnecessary environmental losses. Likewise, adding plants to every gap can increase crowding rather than correct the cause. Maintain enough space for the intended mature hedge and use selective pruning to guide branching. If continued growth would create a conflict with windows or equipment, reconsider the target size instead of encouraging expansion that must soon be removed.
Check the Florida site, not just the address
Florida is not one uniform growing environment. Compare your property's winter exposure, hours of direct light, drainage, and available bed width before selecting clusia. A warm coastal courtyard and an exposed inland lot can behave differently even within the same community. Check the bed after a substantial rain and look for standing water, soil washed against stems, and runoff arriving from adjacent paving. Locate irrigation pipes, underground services, septic components, easements, and access routes before excavation. Arrange utility marking through the appropriate service; private lines may require a separate locator. Ask a qualified landscape professional to assess tight boundaries, questionable drainage, or conflicts with structures. A hedge should fit its maintained size without blocking visibility, gates, equipment access, or required clearances. Where the site does not fit, changing the plant or layout is better than relying on constant corrective maintenance.
Track progress with repeatable observations
Use a simple growth checklist: mark a consistent photo location, record the date, note plant identity, and measure representative plants from the same ground reference. Include width and lower-branch density, not height alone. Note major weather events, pruning, irrigation changes, and any replacements so comparisons remain meaningful. Avoid interpreting the flush from one favorable period as a dependable yearly pace. Review the planting as a whole and investigate outliers early rather than giving every plant the same treatment. Ask your installer what establishment observations should trigger a visit. This approach produces a realistic picture of your own hedge without pretending that a published tree description predicts the timing of privacy at your property.
Support establishment without a rigid schedule
Inspect the original root ball and the surrounding soil separately; they can hold very different amounts of moisture. Check below the surface with a finger or suitable probe before deciding whether to water. Water when those checks show a need, applying it slowly enough to wet the root zone without sustained ponding. Rainfall, soil texture, wind, season, and nursery container size all change that decision. A timer setting is not evidence that roots received enough water. Keep mulch away from stems and avoid burying the root flare when adding soil or refreshing beds. Do not use fertilizer as a first response to stress. Review drainage, planting depth, roots, and irrigation first; obtain soil guidance and follow product labels and applicable local fertilizer restrictions if feeding is justified. Newly installed plants need observation even when established clusia nearby appears self-sufficient.
A practical checklist and reliable references
Before authorizing work, record the plant identification, measured bed dimensions, desired finished height, and any access restrictions. Photograph the whole planting and representative leaves so future changes are easier to compare. Walk the entire line rather than judging it from one attractive plant. After rain or irrigation, check low spots and a few root balls along both sunny and shaded stretches. Record what you actually observe before changing water, fertilizer, or pruning. Request a written scope that explains who handles installation corrections, debris removal, and follow-up inspections. If a problem persists or a major structural decision is involved, consult your county Extension office or an appropriately qualified landscape or tree professional.
Reference checks for this guide: UF/IFAS ST172, “Clusia rosea: Pitch Apple” (https://ask.ifas.ufl.edu/publication/ST172); Sarasota County Extension's species comparison (https://blogs.ifas.ufl.edu/sarasotaco/2024/02/07/flora-da-friendly-features-imposter-pitch-apple/); and Hillsborough County Extension's landscape overview (https://blogs.ifas.ufl.edu/hillsboroughco/2021/12/31/clusia-a-hugely-popular-landscape-plant/). Apply each source only to the plant and conditions it actually discusses.
Before you plant
- Confirm the botanical species and mature size.
- Check drainage, irrigation, utilities and property setbacks.
- Measure hedge length and discuss starting height.
- Review local restrictions and your written quote.
Check your USDA hardiness zone
Questions, answered
Plant care references
Clusia King Farms
Best Clusia in Florida
Get a farm-direct quote in minutes.
Step 1 of 3